Crafting the Skies
A DIY Guide to Understanding Drone Components
DIY
For DIY enthusiasts fascinated by the world of unmanned aerial vehicles (UAVs), embarking on a journey to understand and build drone components opens up a realm of creative possibilities. Drones, with their soaring capabilities and versatile applications, are no longer confined to the realm of experts. In this comprehensive guide, we'll dive into the intricacies of each drone component, empowering DIY enthusiasts to not only comprehend the technology behind these aerial marvels but also embark on the thrilling adventure of building their multirotor drones from scratch.
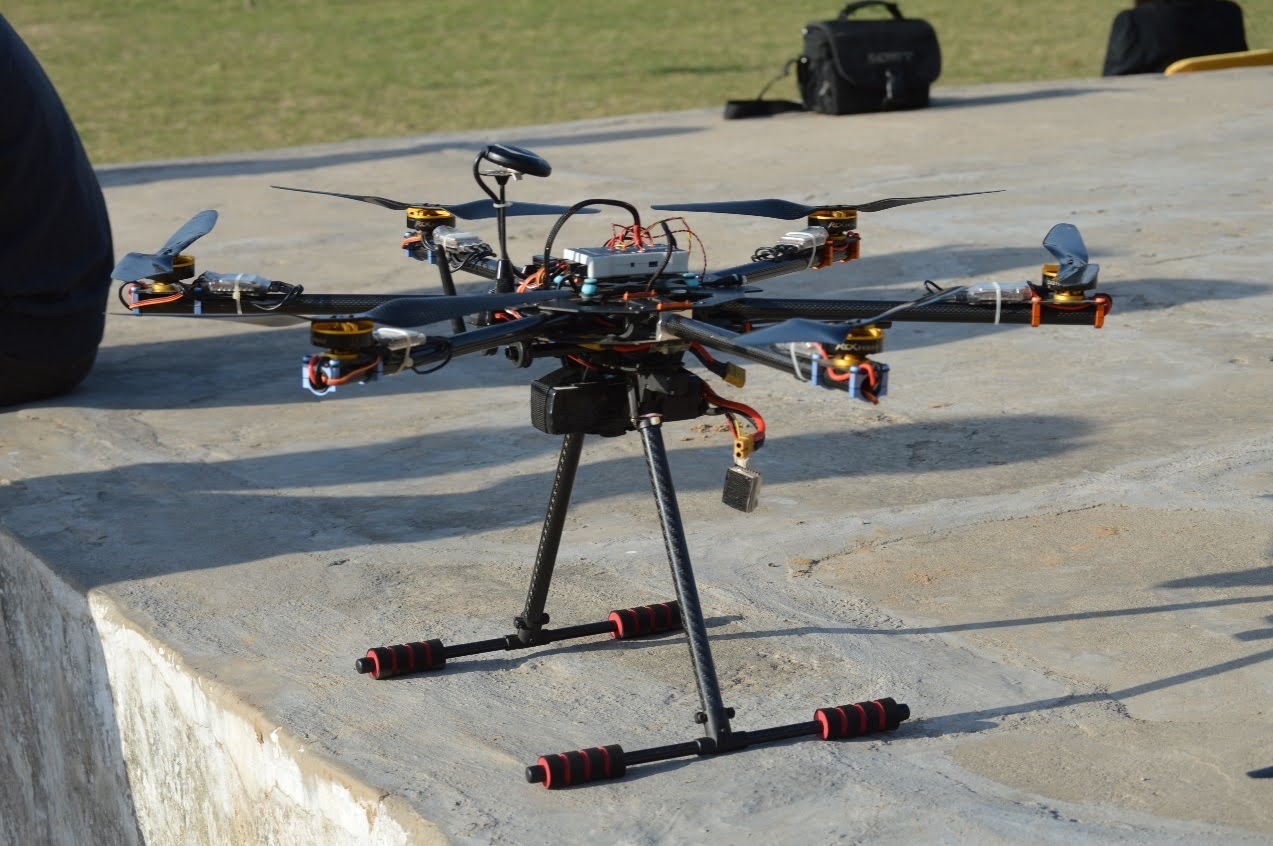
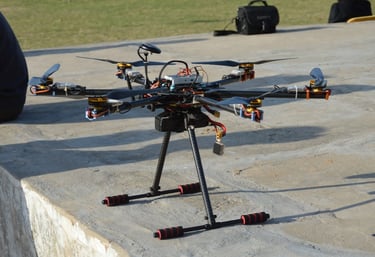
Frame: Laying the Foundation for Your DIY Drone
The frame of a drone serves as its skeletal structure, providing the essential foundation for all other components. For DIY enthusiasts venturing into the fascinating world of building their drones, understanding the nuances of drone frames is a pivotal first step. Let's delve into the intricacies of drone frames, exploring materials, designs, and considerations that can influence your DIY aerial creation.
Materials
There mainly 4 types of material which are typically used to fabricate multirotor drone frames:
Carbon Fiber:
Pros: Lightweight, durable, and exhibits excellent strength-to-weight ratio.
Cons: Can be more expensive than other materials, but its performance often justifies the cost.
Aluminum:
Pros: Robust, cost-effective, and suitable for various frame designs.
Cons: Tends to be heavier than carbon fiber, impacting overall drone weight and, consequently, flight time.
Wood:
Pros: Economical, and suitable for smaller drones or prototyping.
Cons: Heavier compared to carbon fiber and aluminum, may require additional reinforcement for larger drones.
Plastic:
Pros: Cheapest Option available, Easy Availability and custom designs possible
Cons: Very weak and need reinforcements at critical load bearing points.
Design Considerations
It is crucial to understand the different types of designs of multirotor drones and their geometry configurations and decide which configuration to make:
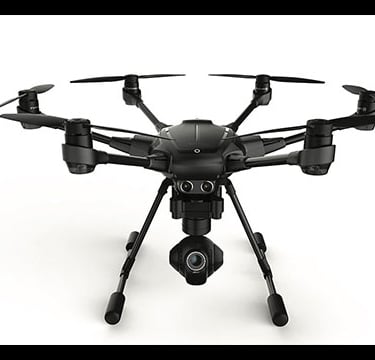
Quadcopter vs. Hexacopter vs. Octocopter:
Quadcopter: Simplest design, ideal for beginners and smaller payloads.
Hexacopter: Offers increased stability and redundancy with six motors.
Octocopter: Provides even more stability and redundancy with eight motors, suitable for heavy payloads.
Foldable Frames:
Pros: Convenient for portability and storage.
Cons: May introduce additional points of potential failure; require precision in design and construction.
X-Frame vs. H-Frame vs. Alien Frame:
X-Frame: Balanced weight distribution, easy to control.
H-Frame: Simple design, suitable for larger drones and heavier payloads.
Alien Frame: A hybrid design combining features of X and H frames, providing agility and stability.
Additional Features:
DIY enthusiasts also need to consider the following things while building their drone:
Motor Mounting Options:
Bottom Mount: Motors are mounted on the underside of the arms.
Top Mount: Motors are mounted on the topside of the arms.
Mid Mount: Motors are positioned in the middle section of the frame.
Camera Mounting:
Considerations for mounting a camera for FPV (First Person View) or aerial photography.
Some frames include designated spaces for cameras, gimbals, or other accessories.
Construction and Assembly:
Modularity:
Some frames offer modular designs, allowing for easier repairs or upgrades.
Modular frames often come with standardized mounting options for various components.
Ease of Assembly:
Consider frames that facilitate straightforward assembly, especially for DIY enthusiasts with varying levels of experience.
Thus, the choice of a drone frame is a critical decision that sets the stage for the entire build. By understanding the materials, design considerations, size, and additional features, DIY enthusiasts can tailor their frames to meet specific goals, whether it's agile racing, stable aerial photography, or heavy-lift applications. The world of drone building begins with the frame, providing the canvas for your aerial masterpiece.
Motors and Propellers: Propelling Your DIY Drone Creation
Understanding the dynamics of motors and propellers is crucial for DIY drone enthusiasts. Dive into the world of brushless DC motors, considering factors like KV rating and efficiency. Selecting the right propellers in terms of size and pitch is equally important, influencing not only performance but also the overall flight characteristics of your DIY drone.
Motors:
Motors are the main propulsion component of any drone, these are the component which converts electrical energy from battery to mechanical energy and rotates the propellers which in-turn generates lift. It is very important to choose the correct type of motor according to the type of drone and using the incompatible motor may lead to inefficient or unstable drone.
Brushed vs. Brushless Motors:
Brushed Motors: Simpler in design, but generally less efficient and have a shorter lifespan.
Brushless Motors: More efficient, durable, and widely used in modern drones.
Types of Brushless Motors:
Out-runner Motors: The outer casing rotates, providing a higher torque.
In-runner Motors: The inner rotor spins, offering a more compact design with higher RPM.
KV Rating:
Indicates the motor's RPM per volt; higher KV values result in faster-spinning motors.
Consider the desired application – lower KV for efficiency and longer flight times, higher KV for racing or agility.
Stator Size and Windings:
Larger stator size generally means more power.
The number of windings affects torque and efficiency; fewer windings may result in higher RPM.
Motor Configuration:
Quadcopters: Typically use four motors, one per arm.
Hexacopters and Octocopters: Utilize six or eight motors, providing increased stability and payload capacity.
Propellers
Propellers are the components which are responsible for generating thrust/lift in drone.
Size and Pitch:
Size: Larger propellers generally provide more thrust but may consume more power.
Pitch: The angle at which the propeller blades are set; affects the drone's speed and efficiency.
Number of Blades:
Two-Blade (Bi-Blade): Common for racing drones, offering high speed.
Three-Blade (Tri-Blade): Balances speed and thrust, suitable for various applications.
Four-Blade (Quad-Blade): Provides increased stability and lift, often used in cinematic drones.
Material:
Plastic: Lightweight and cost-effective; suitable for beginners and racing drones.
Carbon Fiber: Lightweight and rigid, preferred for high-performance and efficiency.
Propeller Rotation:
Clockwise (CW) and counterclockwise (CCW) rotation.
Correct motor and propeller pairing is crucial for stable flight; follow the designated rotation for each motor.
Matching Motors and Propellers
It is crucial for drone to use compatible and correct motors and propellers as failure in doing so will lead to unstable or unflyable drone.
Thrust-to-Weight Ratio:
Balance the thrust generated by the motors with the overall weight of the drone.
Achieving the right thrust-to-weight ratio ensures optimal performance.
Amps and Voltage Compatibility:
Ensure that the motor's current (amps) and voltage specifications match the capabilities of the drone's power system.
Flight Characteristics:
Customize the drone's flight characteristics by selecting motors and propellers that align with the intended use – racing, aerial photography, or long-range flights.
Consideration for Payload:
Factor in any additional weight from accessories or cameras when selecting motors and propellers.
In the dynamic interplay between motors and propellers, DIY drone builders have the opportunity to tailor their creations to specific needs and preferences. Whether aiming for high-speed racing, stable aerial photography, or versatile all-around performance, understanding the nuances of motors and propellers is key to unlocking the full potential of a DIY drone project. As the propellers spin and the motors hum, the collaboration between these components propels your drone creation into the skies with precision and power.
Electronic Speed Controllers (ESCs): Mastering Power Regulation
ESCs act as the bridge between your drone's power source and motors. For DIY builders, delving into the intricacies of ESCs involves selecting the right amperage, understanding firmware options, and ensuring compatibility with your chosen flight controller. Properly configured ESCs contribute to smooth, stable flights.
Understanding Electronic Speed Controllers (ESCs)
Functionality:
ESCs convert the direct current (DC) supplied by the drone's battery into a variable three-phase alternating current (AC) that drives the brushless motors.
They control the speed of the motors by adjusting the frequency and amplitude of the AC signals.
Types of ESCs:
Single ESC: Each motor has its dedicated ESC; common in smaller drones.
Four-in-One ESCs: All four motors connected to a single ESC board; popular in quadcopters.
Signal Input and Output:
Input Signal: Received from the flight controller, indicating the desired motor speed.
Output Signal: Sent to the motor, adjusting the power supplied to achieve the desired speed.
Key Considerations for DIY Enthusiasts
Amps (Current) Rating:
Match the ESC's current rating with the current draw of the motors to prevent overheating and potential damage.
Consider the overall power requirements of your drone, factoring in the number of motors and their specifications.
Voltage Compatibility:
Ensure that the ESCs can handle the voltage supplied by the drone's battery.
Matching the voltage is crucial for preventing damage to the ESC and ensuring reliable operation.
Programming and Calibration:
Opt for ESCs that allow for easy programming and calibration.
Calibration ensures that all ESCs respond uniformly to the flight controller's input, promoting balanced motor performance.
Brake Functionality:
Some ESCs come with brake functionality, which can assist in rapid deceleration and stabilization.
Consider the need for braking based on your drone's application and flight characteristics.
BEC (Battery Eliminator Circuit):
Many ESCs feature a BEC that provides regulated power for the drone's flight controller and other electronics.
Ensure that the BEC's voltage output matches the requirements of your onboard electronics.
Size and Weight:
Consider the physical dimensions and weight of the ESCs, especially in compact drone builds.
Balance the need for lightweight components with the power and features required for your DIY drone.
ESC Calibration and Setup
Throttle Calibration:
Calibrate each ESC to ensure synchronized response to throttle inputs.
Follow the manufacturer's instructions for proper calibration procedures.
Motor Direction:
Confirm that each motor is spinning in the correct direction.
Incorrect motor direction can lead to unstable flight; reverse the motor connections if necessary.
Testing and Troubleshooting:
Conduct thorough testing of each ESC and motor before the maiden flight.
Address any issues promptly through troubleshooting, ensuring a smooth and stable flight experience.
In the intricate dance of DIY drone building, Electronic Speed Controllers emerge as choreographers, orchestrating the seamless interaction between the drone's brain and its propulsive force. By comprehending the functionalities and considerations surrounding ESCs, DIY enthusiasts can navigate the complexities of power regulation with confidence. As the ESCs hum to life, translating electronic signals into graceful motor rotations, they become the silent architects of a DIY drone's flight, ensuring precision, stability, and the thrill of aerial exploration.
Flight Controller: The DIY Drone's Brain
The flight controller is the central intelligence unit of your DIY drone, interpreting sensor data and translating it into precise control commands. Explore the diverse array of flight controllers available, considering factors like sensor types, processing power, and compatibility with your chosen frame and components.
Anatomy of a Flight Controller
Sensors:
Gyroscope: Measures angular velocity, aiding in stability and orientation.
Accelerometer: Detects changes in velocity, contributing to altitude control.
Magnetometer: Provides compass data, aiding in navigation and heading.
Microcontroller:
The brain of the flight controller, processes sensor data and executes control algorithms.
Common microcontrollers include STM32 and Atmel AVR.
Connectivity:
Interfaces with receivers for remote control input.
Communicates with electronic speed controllers (ESCs) to regulate motor output.
May include ports for additional modules like GPS and barometers.
Onboard Memory:
Stores firmware, configuration settings, and flight logs.
The capacity varies among flight controllers, influencing the features it can support.
Power Distribution:
Distributes power to connected peripherals and sensors.
Often includes a voltage regulator to ensure stable power supply.
Key Considerations for DIY Drone Builders
Flight Modes:
Flight controllers offer various modes catering to different flying styles, such as stabilized, acro, or altitude hold.
Consider the intended use of your drone to choose a controller with suitable flight modes.
Compatibility:
Ensure compatibility with your chosen radio transmitter and receiver system.
Verify that the flight controller supports the number and type of motors you plan to use.
Firmware:
Regularly updated firmware enhances performance and unlocks new features.
Choose a flight controller with active firmware development and a supportive community. Ardupilot and PX4 firmware are two most famous and common firmware in use for DIY Drones
Integrated vs. Separate Components:
Integrated flight controllers incorporate additional features like PDB (Power Distribution Board) and OSD (On-Screen Display).
Separate components provide flexibility for customization but may require more intricate wiring.
Processing Power:
Consider the processing power of the flight controller, especially for advanced features like GPS navigation or autonomous flight.
Higher processing power can accommodate more sophisticated algorithms.
Configuration and Setup
Software Interface:
Most flight controllers are configured through graphical user interfaces (GUIs) or command-line interfaces.
Popular software includes Betaflight, Cleanflight, PX4, Ardupilot
Sensor Calibration:
Calibrate sensors to ensure accurate data readings.
Gyro and accelerometer calibration is crucial for stable flight.
PID Tuning:
Fine-tune Proportional, Integral, and Derivative (PID) parameters to optimize drone responsiveness and stability.
PID tuning is an iterative process and may require adjustments based on flight performance.
Radio Receiver Binding:
Bind your radio transmitter to the flight controller to establish a secure connection.
Verify proper channel assignment and control surface movements.
GPS Integration:
Enables features like return-to-home, waypoint navigation, and geofencing.
Suitable for drones focusing on autonomous capabilities.
Telemetry Support:
Allows real-time data transmission between the drone and ground station.
Monitors battery voltage, GPS coordinates, and other vital information.
As the hub of intelligence in a DIY drone, the flight controller wields influence over every aerial maneuver. By unraveling its intricacies and aligning its capabilities with project goals, DIY enthusiasts can navigate the skies with confidence. With each configuration parameter set and sensor calibrated, the flight controller transforms from a mere component to the orchestrator of flight, inviting builders to explore the boundless possibilities of controlled, exhilarating drone journeys.
Battery: Powering Your Aerial Creation
Selecting the right battery is crucial for ensuring optimal performance and flight time. DIY enthusiasts can explore different battery chemistries, such as lithium-polymer (LiPo) or lithium-ion, and understand the importance of factors like voltage, capacity, and discharge rates in determining their drone's power supply.
Types of Drone Batteries
Lithium Polymer (LiPo) Batteries:
Pros: Lightweight, high energy density, suitable for various drone sizes.
Cons: Require careful handling, susceptible to damage if mishandled or overcharged.
Lithium-Ion (Li-Ion) Batteries:
Pros: More stable than LiPo batteries, longer lifespan.
Cons: Slightly heavier and less energy-dense than LiPo batteries.
Nickel Metal Hydride (NiMH) Batteries:
Pros: Less prone to damage from overcharging, cost-effective.
Cons: Heavier and less energy-dense compared to lithium batteries.
Graphene Batteries:
Pros: High energy density, lightweight, and can provide high discharge rates.
Cons: Relatively expensive compared to traditional lithium batteries.
Considerations for Choosing Drone Batteries:
Voltage and Cell Count:
Match the battery voltage to the drone's power system requirements.
Choose the appropriate cell count (S) – commonly available in 3S, 4S, 6S configurations.
Capacity (mAh):
Higher mAh ratings indicate longer flight times.
Balance capacity with weight considerations for optimal performance.
Discharge Rate (C Rating):
The discharge rate determines how quickly the battery can release its energy.
Choose a C rating that meets or exceeds the drone's power demands for smooth performance.
Connector Type:
Ensure the battery's connector type matches that of the electronic speed controllers (ESCs) on your drone.
Common connectors include XT60 and XT30.
Size and Weight:
Consider the physical dimensions and weight of the battery, especially in compact drone builds.
Balance the need for capacity with the practicality of size and weight.
Charging and Maintenance Tips:
Balancing Chargers:
Use a balancing charger to ensure each cell in the battery is charged evenly.
Regularly check and balance batteries to prolong their lifespan.
Storage Voltage:
Store LiPo batteries at approximately 3.8V per cell for optimal longevity.
Avoid storing batteries fully charged or completely depleted.
Temperature Considerations:
Charge and operate batteries in a temperature-controlled environment.
Extreme temperatures can affect battery performance and lifespan.
Regular Inspections:
Check batteries for physical damage or swelling.
Discard damaged batteries to prevent safety hazards.
Transportation Safety:
When transporting batteries, use dedicated fireproof bags to mitigate the risk of fire in case of a malfunction.
Store batteries in a cool and dry place.
Cycle Life:
Understand the expected cycle life of the battery, which is the number of charge-discharge cycles it can endure before performance degrades.
As the silent powerhouse driving your drone's flight, the battery plays a pivotal role in determining the duration and reliability of your soaring adventure. By comprehending the nuances of different battery types, considering key factors in battery selection, and adhering to prudent charging and maintenance practices, DIY drone enthusiasts can ensure a seamless and exhilarating flight experience. As your drone takes to the skies, propelled by the energy stored within its battery, the boundless possibilities of aerial exploration become a tangible reality.
GPS Module: Navigational Precision
For drones venturing beyond line-of-sight, GPS modules are indispensable. These modules facilitate accurate positioning, navigation, and the execution of pre-programmed flight paths. GPS technology not only enhances navigational precision but also enables features such as return-to-home functionality and geofencing.
Understanding GPS Technology
Satellite Reception:
GPS modules receive signals from satellites orbiting the Earth, determining the drone's location through trilateration.
A typical GPS module requires signals from at least four satellites for accurate positioning.
Positioning Accuracy:
The accuracy of a GPS module is influenced by factors such as the number of satellites in view, atmospheric conditions, and the quality of the module itself.
Differential GPS (DGPS) systems can enhance accuracy by using ground-based reference stations.
Coordinate Systems:
GPS coordinates are typically expressed in latitude, longitude, and altitude.
Common coordinate systems include WGS 84 (World Geodetic System 1984) and ECEF (Earth-Centered, Earth-Fixed).
Key Components of GPS Modules
GPS Receiver:
The receiver processes signals from satellites, calculating the drone's position and velocity.
Modern GPS modules often integrate additional navigation systems like GLONASS for enhanced accuracy.
Antenna:
The antenna captures satellite signals and plays a crucial role in the module's overall performance.
External antennas are preferred for better signal reception, especially in challenging environments.
Processor and Memory:
A dedicated processor handles the calculations necessary for accurate positioning.
Memory stores satellite data and assists in acquiring a faster GPS fix upon startup.
Interfaces:
GPS modules feature various interfaces for communication with other drone components, such as UART, I2C, or SPI.
Compatibility with the flight controller and other onboard systems is essential.
Considerations for GPS Module Selection
Accuracy Requirements:
Determine the level of accuracy required for your drone's intended applications.
Survey-grade GPS modules offer higher precision but may be overkill for recreational drones.
Update Rate:
The update rate denotes how often the GPS module provides a new set of coordinates.
Higher update rates are crucial for dynamic applications like fast-paced drone racing.
Cold Start and Warm Start Times:
Evaluate the cold start and warm start times, indicating how quickly the module can acquire satellite signals upon startup.
Short start times are advantageous for quick deployment.
Integration with Flight Controller:
Ensure compatibility with your chosen flight controller.
Verify that the flight controller software supports the specific GPS module.
Weight and Size:
Consider the size and weight of the GPS module, especially in smaller drone builds.
Strive for a balance between performance and form factor.
Autonomous Flight Capabilities
Return-to-Home (RTH):
GPS enables accurate RTH functionality, allowing the drone to return to its takeoff point automatically.
Essential for safety and drone retrieval.
Waypoint Navigation:
GPS-equipped drones can follow predefined waypoints autonomously.
Ideal for mapping, surveillance, or surveying applications.
Geofencing:
Define virtual boundaries using GPS coordinates to restrict the drone's flight within a designated area.
Enhances safety and regulatory compliance.
In the ever-expanding landscape of drone capabilities, the GPS module emerges as a cornerstone, ushering in a new era of navigational precision and autonomy. By navigating through the functionalities, components, and considerations of GPS technology, DIY drone enthusiasts can harness the power of accurate positioning and unlock a myriad of exciting possibilities for their aerial creations. As the GPS-equipped drone takes flight, guided by the invisible signals from satellites above, the skies become a canvas for exploration, innovation, and the seamless fusion of technology and adventure.
As we meticulously dissect the components that constitute the anatomy of drones, it becomes apparent that each part contributes to the symphony of flight. The evolution and integration of these components have propelled drones from mere mechanical contraptions to versatile tools with applications spanning various industries. Whether you're a drone enthusiast, a professional pilot, or simply fascinated by technology, understanding the intricacies of drone components unveils the remarkable engineering that underpins their flight. These components beckon us to explore the skies with a profound appreciation for the craftsmanship that goes into creating these airborne marvels.
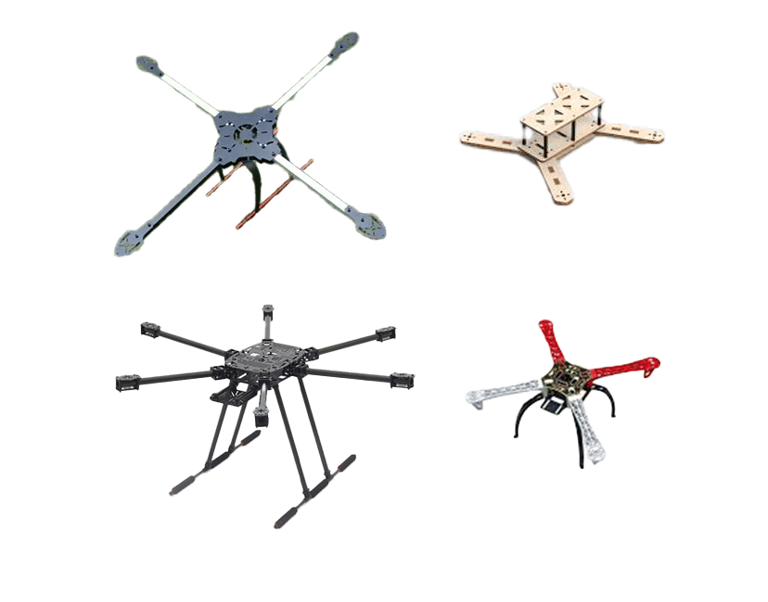
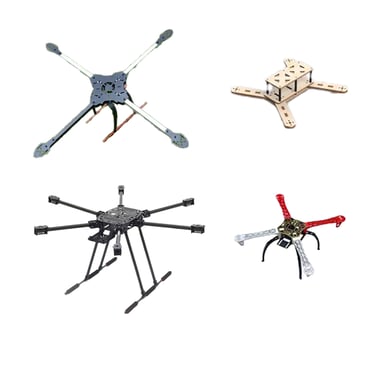
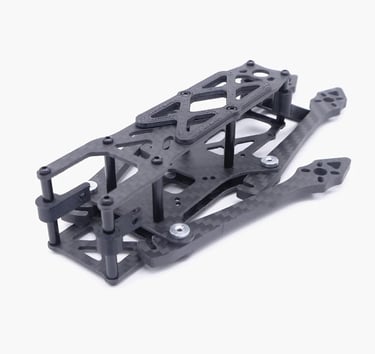
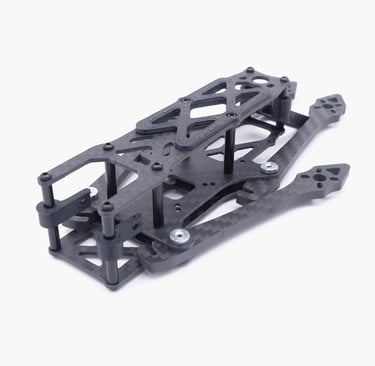
Drone frames of different materials


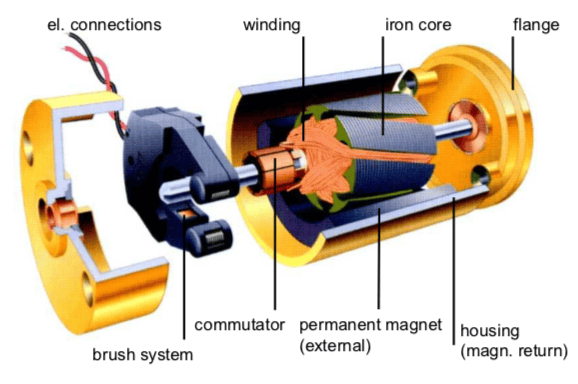

DC Brushed Motor (Source)
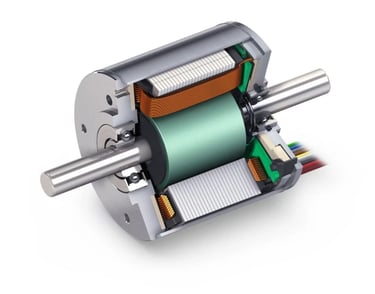
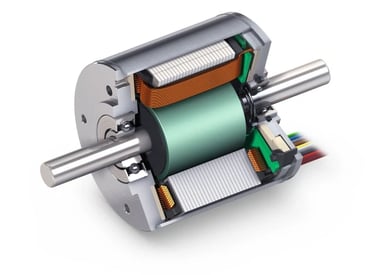
Brushless DC Motor (Source)


Propellors (Source)

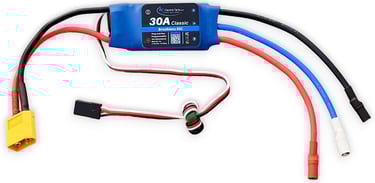
ESC for Brushless Motor (Source)
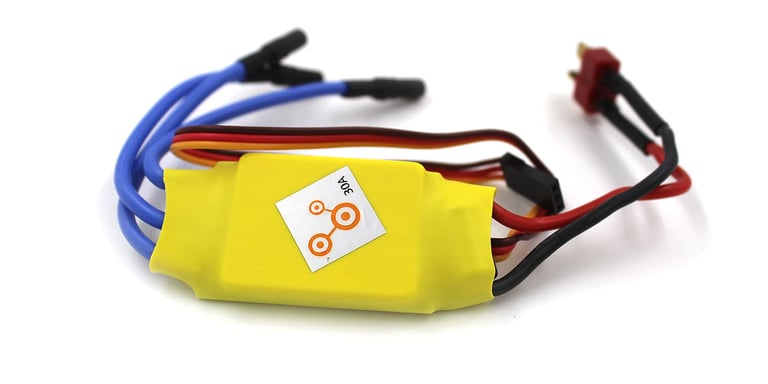
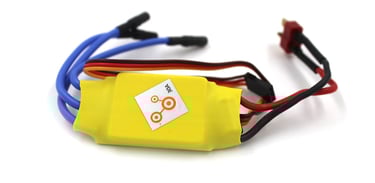
ESC for Brushless Motor (Source)
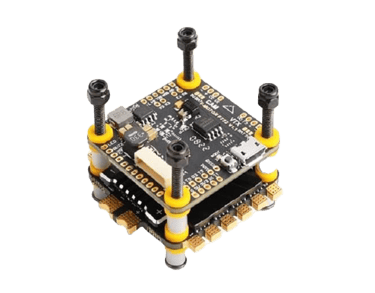
T-Motor F-7 Flight Controller (Source)

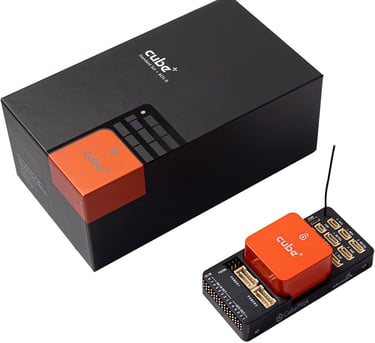
Cube Orange Flight Controller (Source)
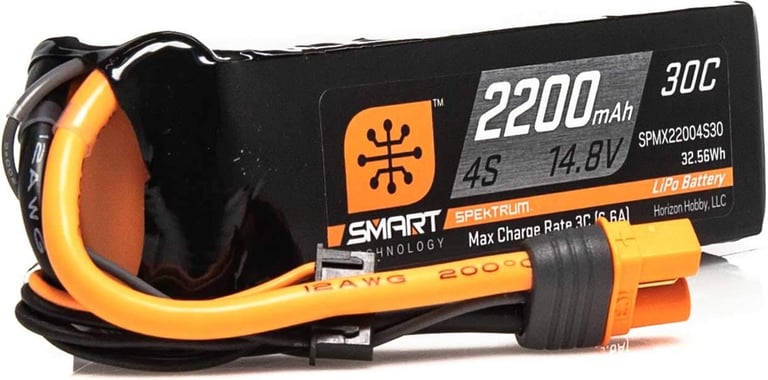

Li-Polymer Battery (Source)

Li-Ion Battery (Source)


NiMH Battery (Source)

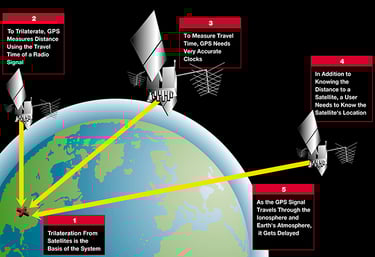
Working of GPS (Source)


UBLOX GPS Module (Source)